Configure gateway using OneClick.
Apply proxy to your services with features like Authentication, Security, Traffic Control and much more. The OneClick API feature allows one to create service with corresponding route and plugin if applied, consumer creation with its dependencies with default values in just few seconds.
Prerequisite
-
Login to Designer by clicking on the link below:
-
Open: Execute / Deploy
-
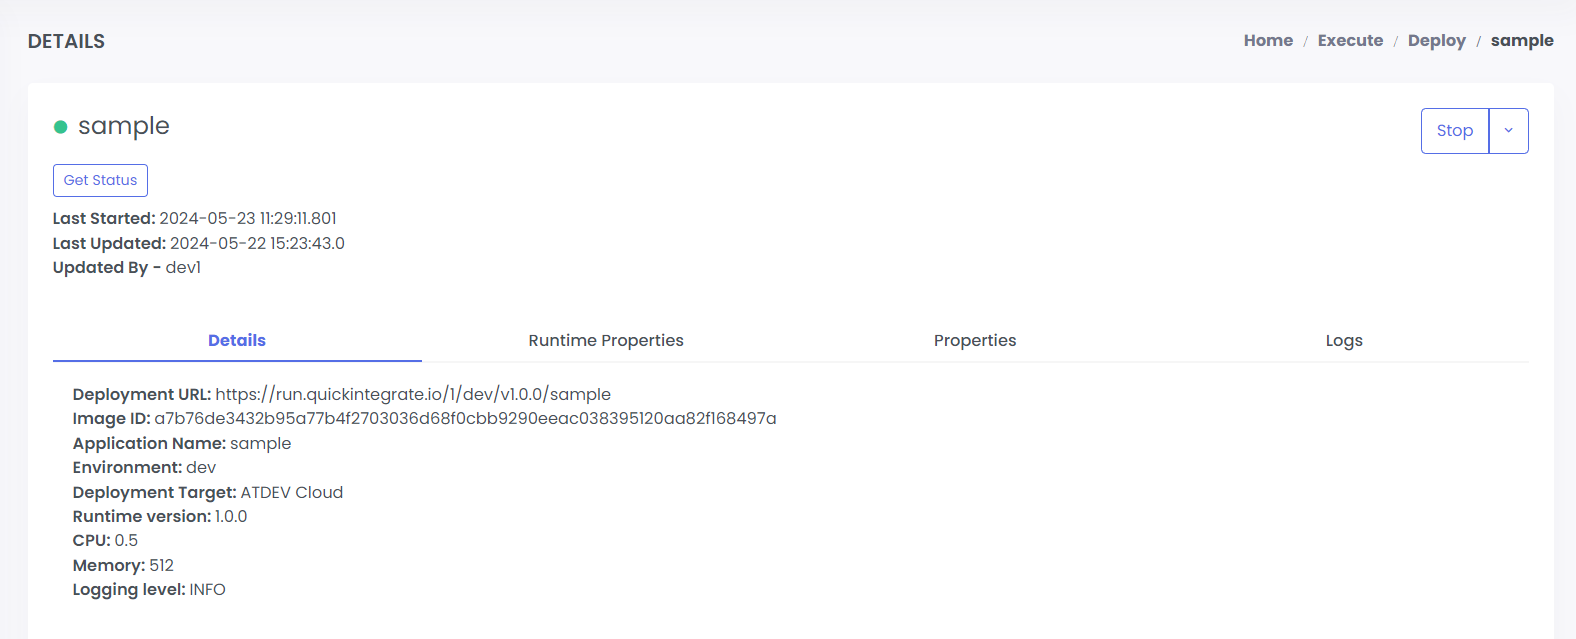
Application must be UP and running which contains the services that you want to configure to gateway. Here we have taken sample project and started it.
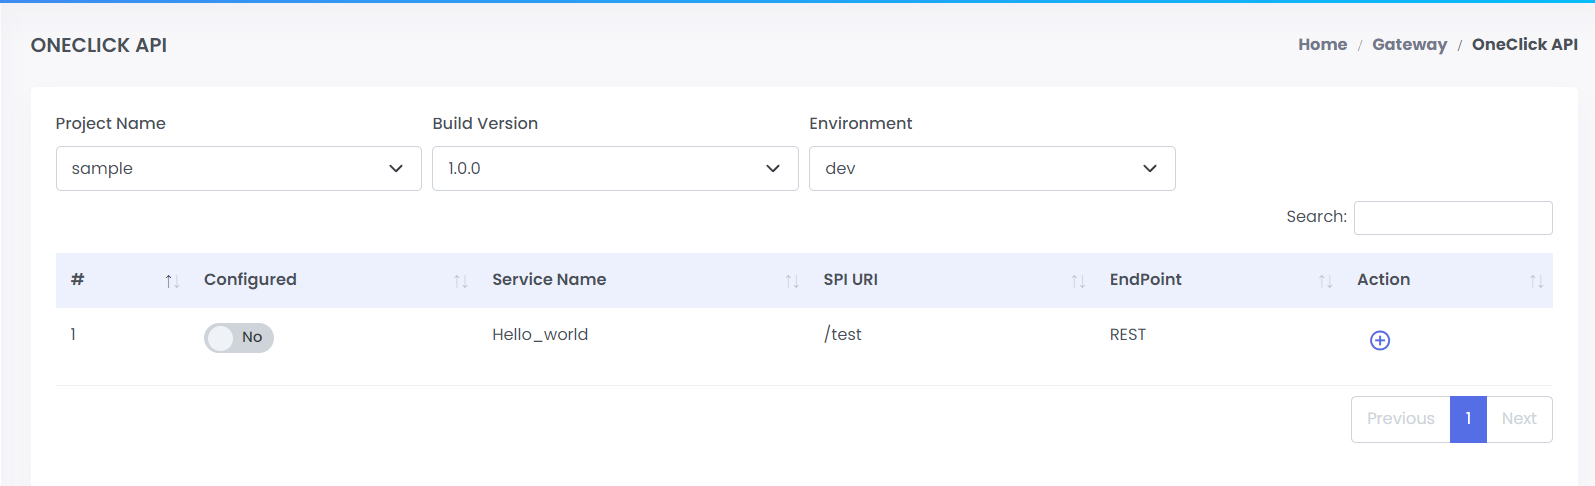
Open: Develop / API / Studio
- Select Project type e.g. Integration
- Select Project Name, Build Version and Environment. Service list will display as below:
New Configuration
- Click on plus button in the Action column of the service that you want to configure to gateway.
- Select the Gateway Environment
- Click on submit if you don't want to change path or apply plugin and your configuration is done.
Default path will be the actual service path you can change it according to your preferences.
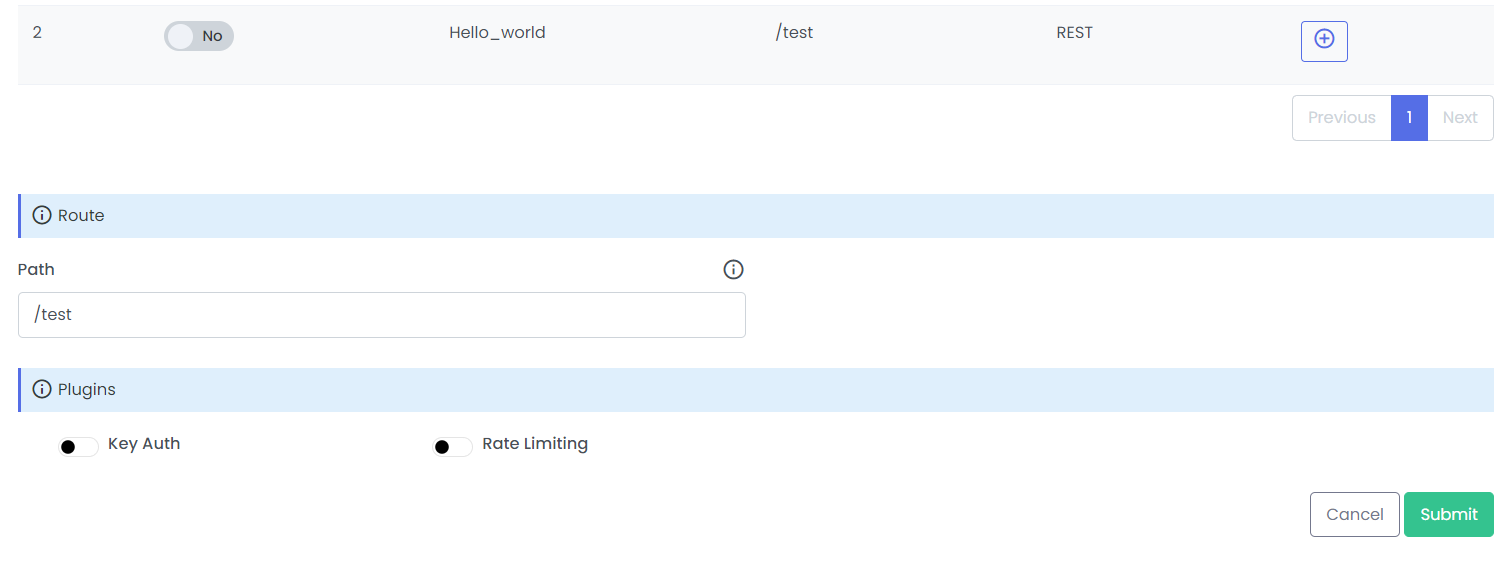
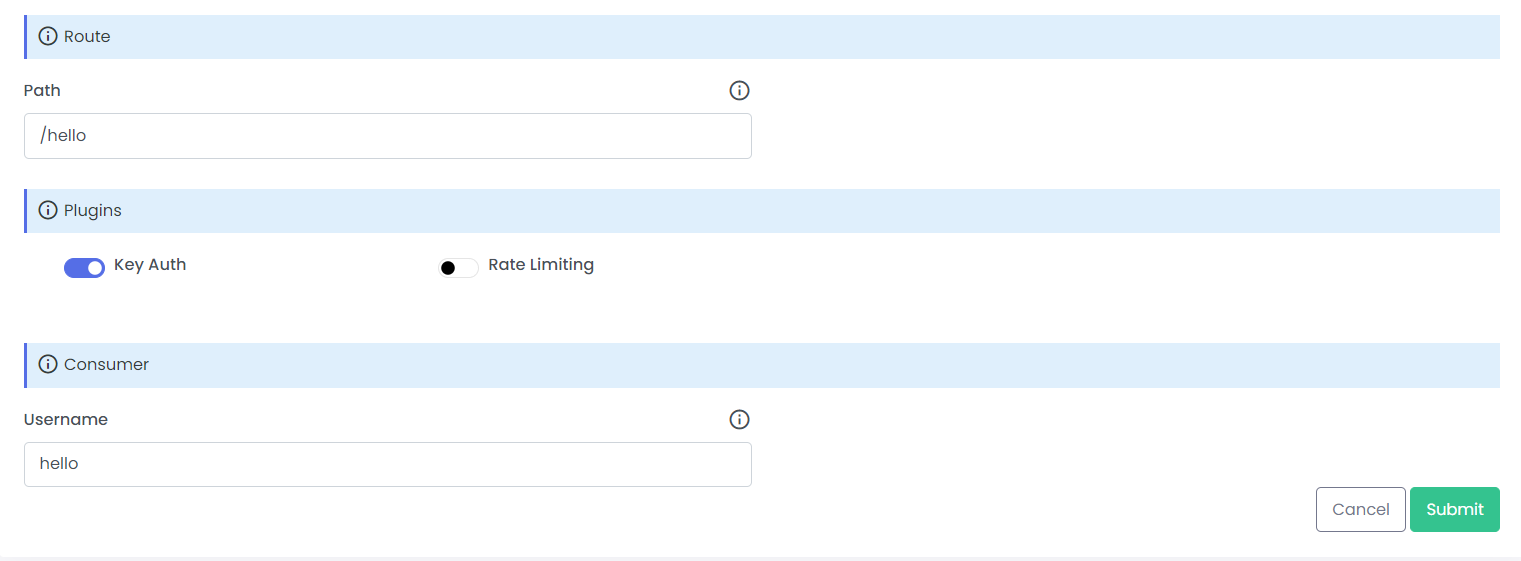
Apply Plugin (optional)
- Check any checkbox to apply any one plugin. Here we have selected Key Auth plugin.
- Now you need to provide a name for consumer.
- Click on submit and your configuration is done.
Access Credentials (optional)
Now that you have successfully configured gateway and applied plugin i.e. Key Auth in this example. You can access your header key name and API keys using below steps:
Login to Monitor
Login to Monitor by clicking on the link below:
https://monitor.quickintegrate.io/login
View Header key name
Key name goes by default in header / query while calling your API.
- Open: Gateway / Plugins.
- Once on the page click on plugin name to view details or on eye icon to see raw view. You can refer to the below image:

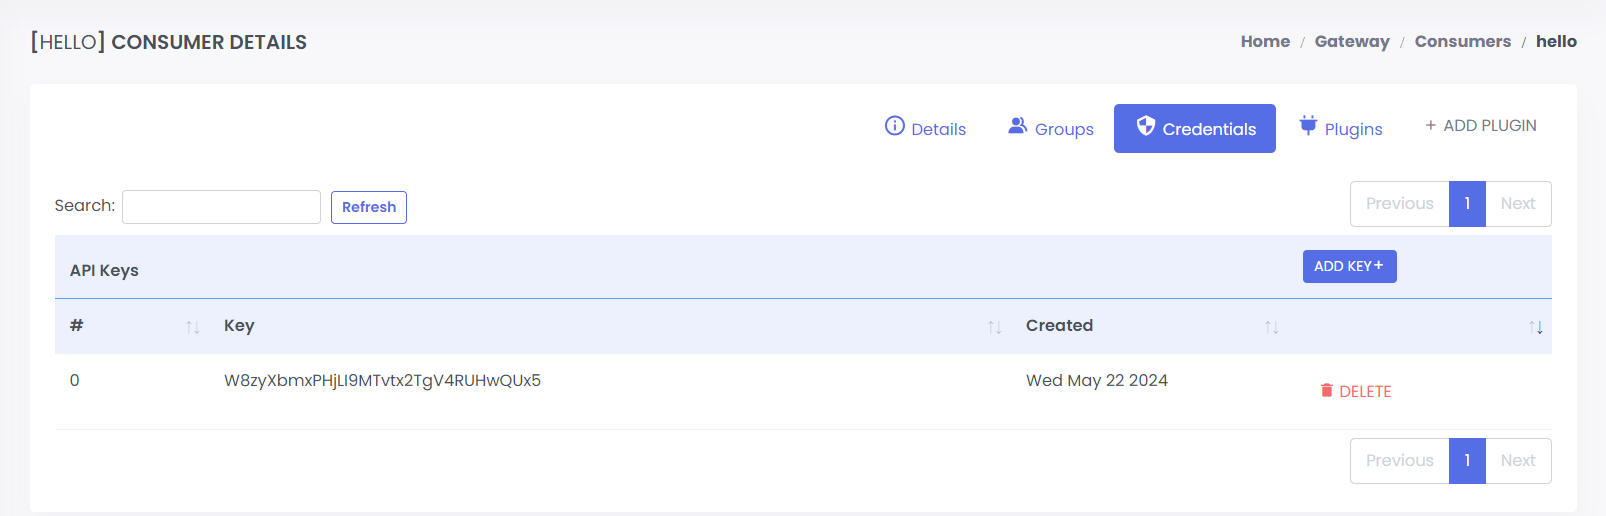
View API keys
- Open: Gateway / Consumers.
- Once on the page click on consumer name to view details.
- Then click on Credentials tab to view all API Keys.
Test using Postman
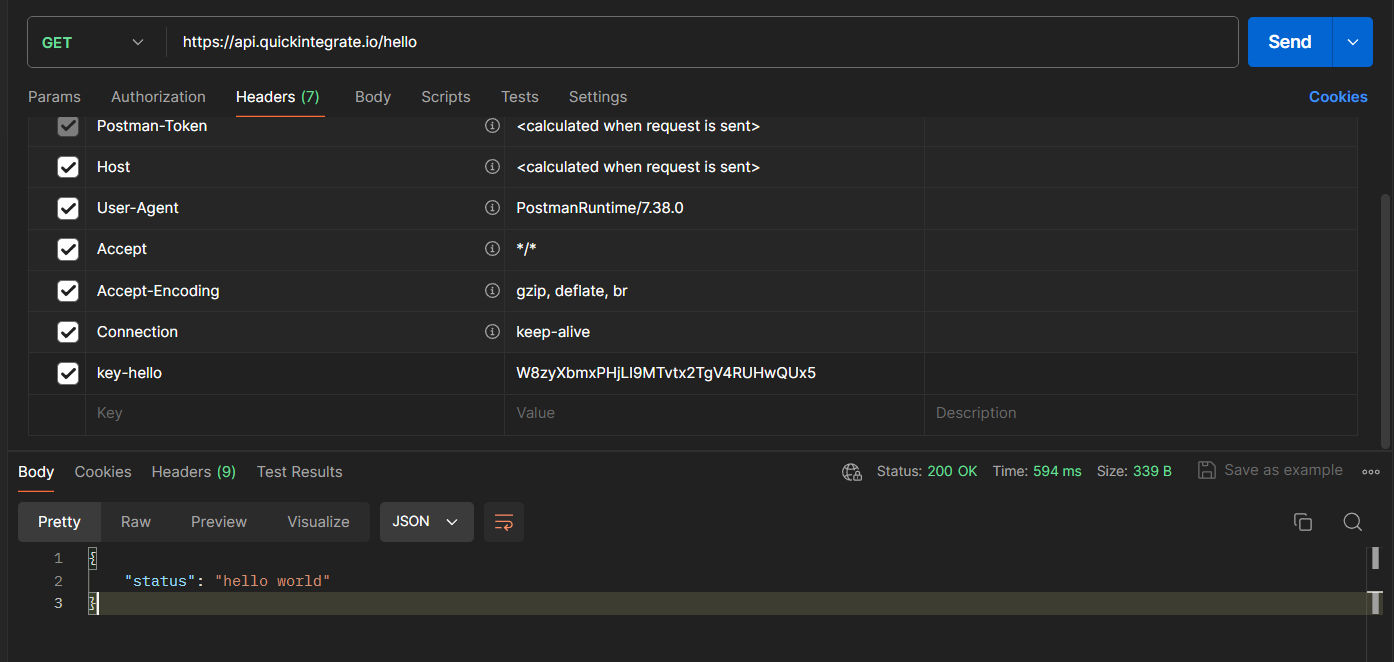
With plugin
Now add the Key name and API key in header.
-
Response with API key
-
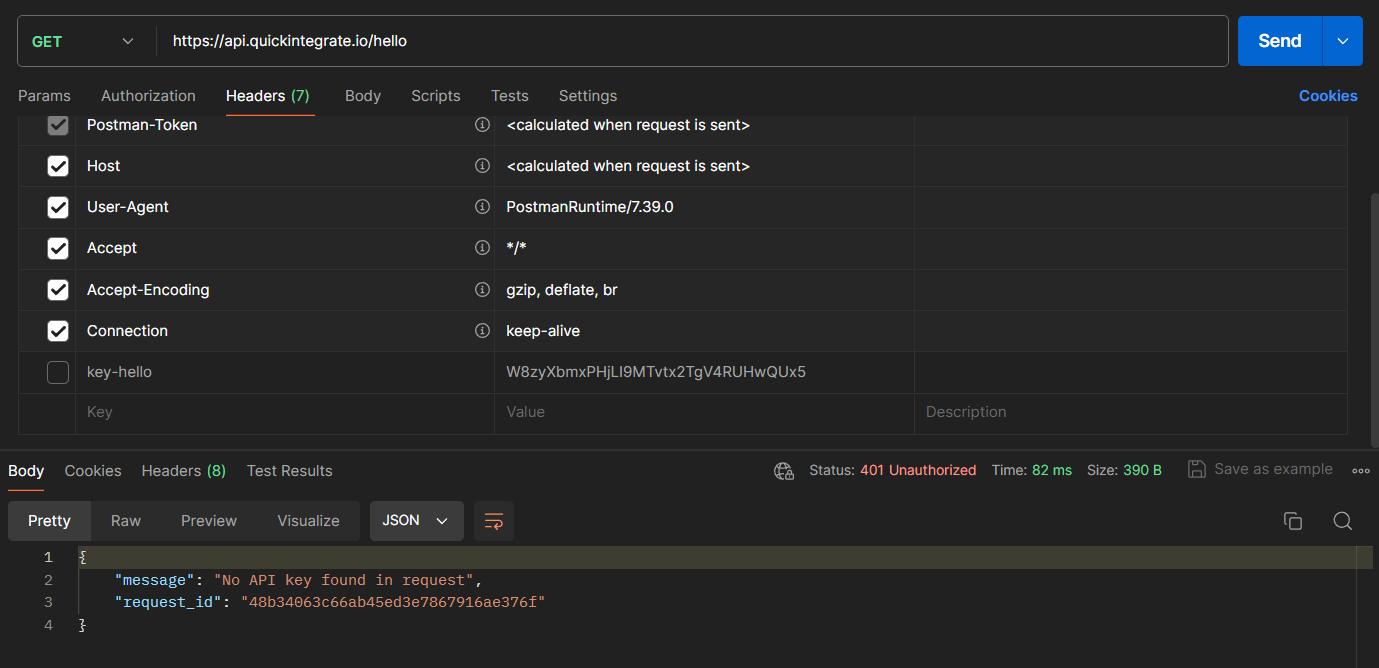
Response without API key
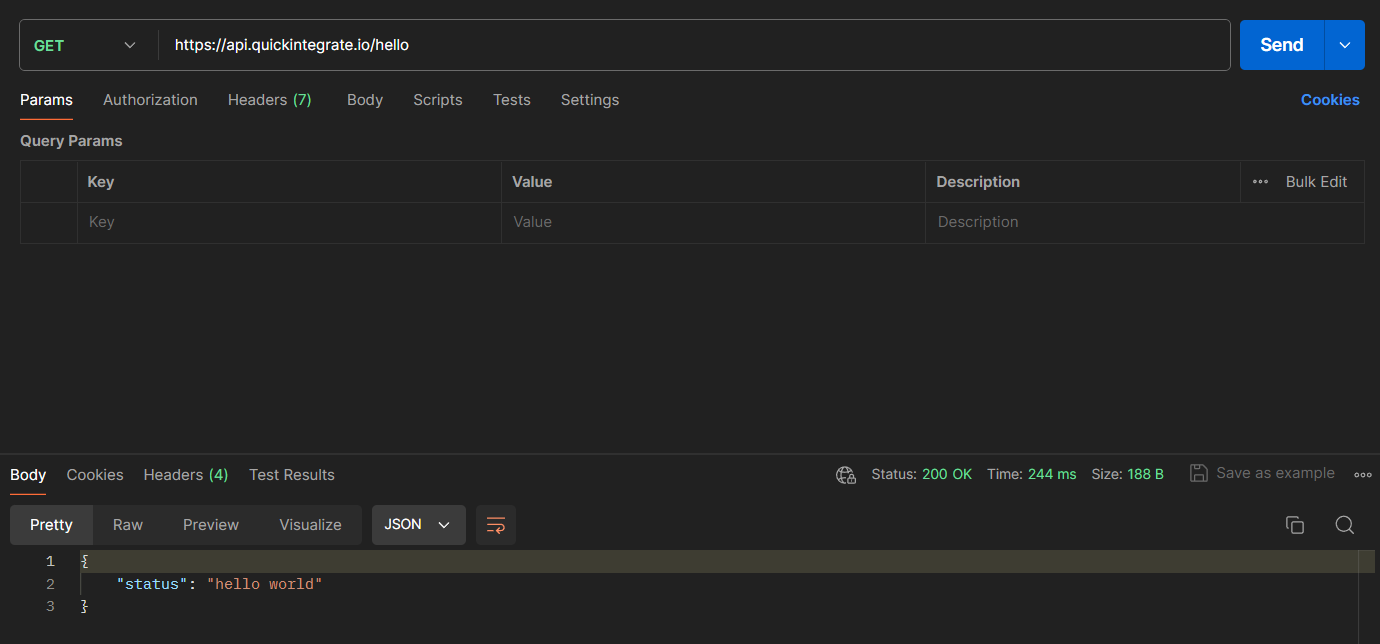
Without plugin
Update Configurations
Now if needed you can change service or route path, host or anything else manually.